Stucco is a well-liked outside surface for homes in Vancouver due to its longevity and artistic appeal. Over time, however, stucco may create cracks and various other kinds of damage that require to be dealt with. While choosing a professional is regularly an possibility, some homeowners prefer to take issues in to their very own palms and seek a DIY stucco fixing project.
If you're looking at handling stucco repair service on your own, it's essential to approach the job along with the right know-how and resources. In this step-by-step overview, we are going to stroll you via the method of mending small stucco damages on your Vancouver property.
Measure 1: Assess the Damages
The first measure in any kind of repair work job is to examine the degree of the harm. Take a close appearance at your stucco exterior and recognize any splits or locations where the appearance has broke away. It's important to calculate whether the damages is completely aesthetic or if it goes deeper into the underlying levels of your house's framework.
Measure 2: Acquire Materials
Once you have assessed the harm, acquire all the important components for your stucco repair service venture. This typically includes:
- Stucco mix: Opt for a high-quality stucco mix that matches the color and appearance of your existing coating.
- Wire mesh: Utilize wire screen to enhance much larger gaps or places where structural honesty has been endangered.
- Trowel: A trowel will be needed for administering and smoothing out the new stucco mix.
- Bucket and water: These are crucial for blending your stucco according to manufacturer guidelines.
- Defensive equipment: Wear handwear covers, protection glasses, and a face cover-up to shield yourself coming from likely harmful dust particles.
Step 3: Prepare the Surface area
Prior to using brand-new stucco, it's important to properly prep the damaged area. Start through cleaning off any loosened debris or old stucco coming from the affected region. Utilize a cord comb or a tension washer to take out gunk, dust, and loosened particles. Allow the area to dry totally prior to moving on to the following action.
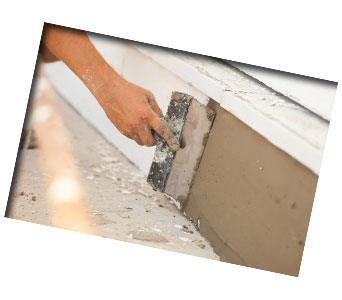
Measure 4: Administer Stucco Mix
Combine your stucco depending on to the maker's guidelines. It's important to attain the right congruity – not also dry out and not also wet. Once you have prepared your stucco mix, administer it to the damaged location using a trowel. Start by loading in any cracks or spaces, ensuring that the combination is uniformly disperse around the area.
Step 5: Enhance with Wire Mesh (if necessary)
For larger cracks or regions where building integrity is risked, reinforce the fixed area with cord net. Cut a part of net somewhat much larger than the ruined place and press it securely into location over the fresh stucco mix. Produce sure it sticks well and doesn't leave behind any voids between the net and existing stucco.
Step 6: Smooth Out and Blend
Making use of your trowel, thoroughly refine out the newly applied stucco mix so that it combinations seamlessly along with the bordering surface. This Article Is More In-Depth requires determination and interest to information as you work to accomplish a even appearance.
Measure 7: Allow Time for Drying
After finishing all repair work, allow enough time for your newly covered stucco to dry out fully. This may take numerous times relying on environmental disorders such as temperature level and moisture amounts.
Measure 8: Paint (if desired)
Once your mended stucco has dried out